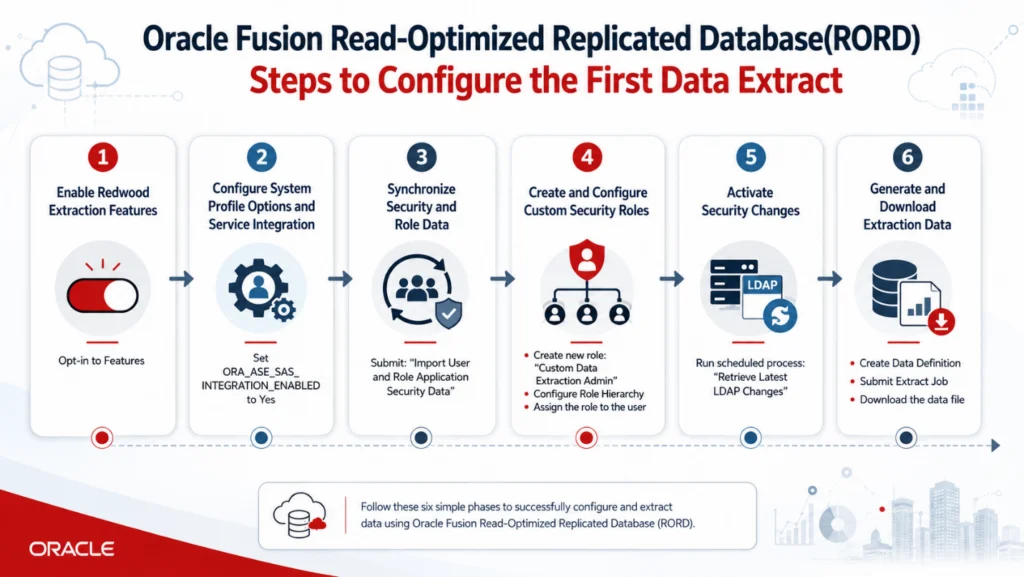
The Oracle Fusion Data Extraction guide provides a step-by-step walkthrough for configuring the Redwood Data Extraction (RORD) framework in Oracle Fusion Applications.
The configuration enables organizations to extract application data from Oracle’s read-only data store using the Redwood user interface.
Phase 1: Feature Enablement (Opt-In)
The first phase enables the Redwood extraction framework within your Oracle Fusion environment.
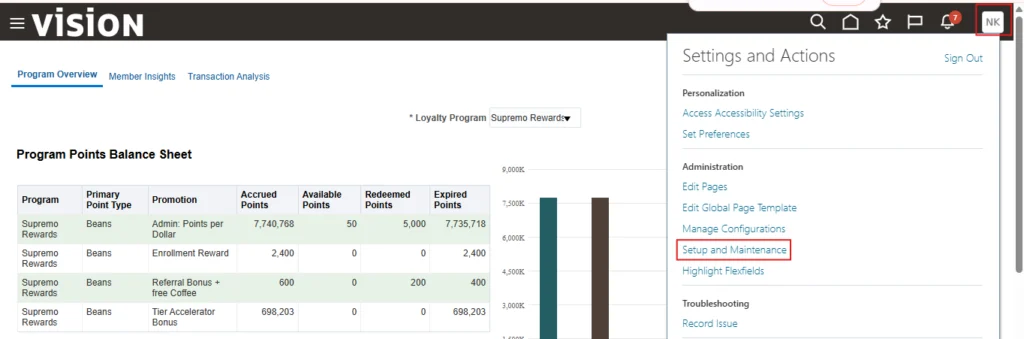
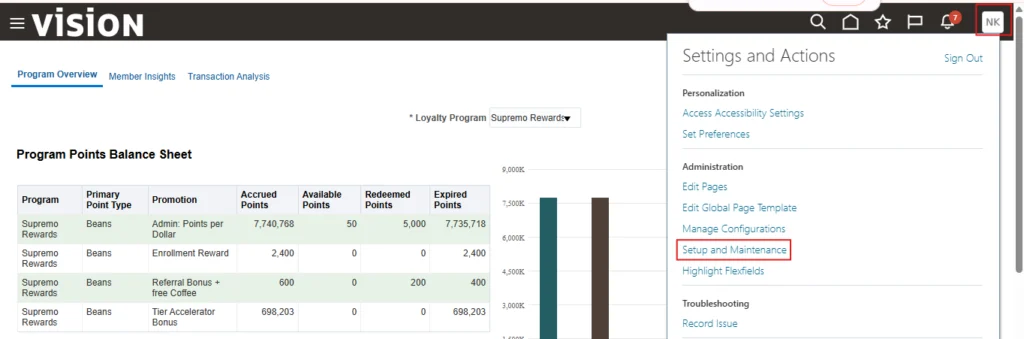
Step 1: Navigate to Setup and maintenance from Settings and Actions menu.
Step 2: Navigate to My Enterprise > Offerings.
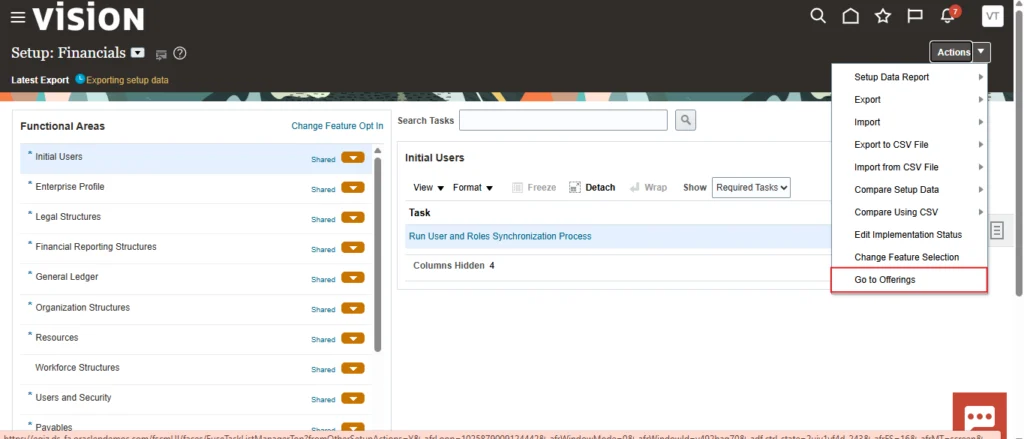
Step 3: Select the Financials offering (Note: This can also be performed under Manufacturing).
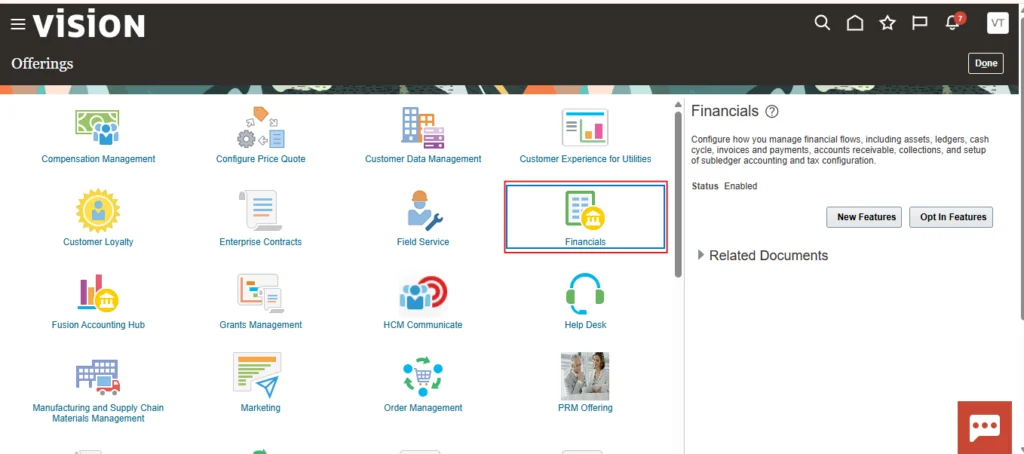
Note: The same configuration can also be performed under the Manufacturing offering.
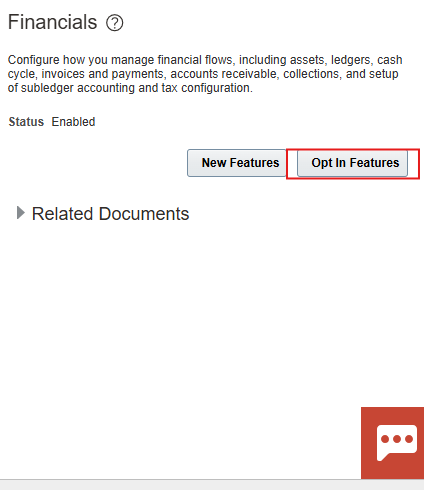
Step 4: Click the Opt-In Features button.
Step 5: Locate the Application Extensions functional area.
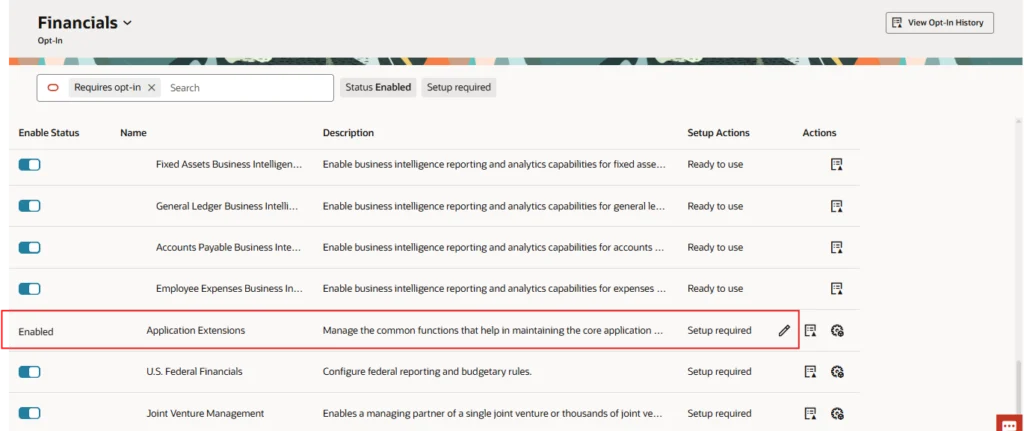
Step 6: Click the Features (Pencil Icon) for Application Extensions.
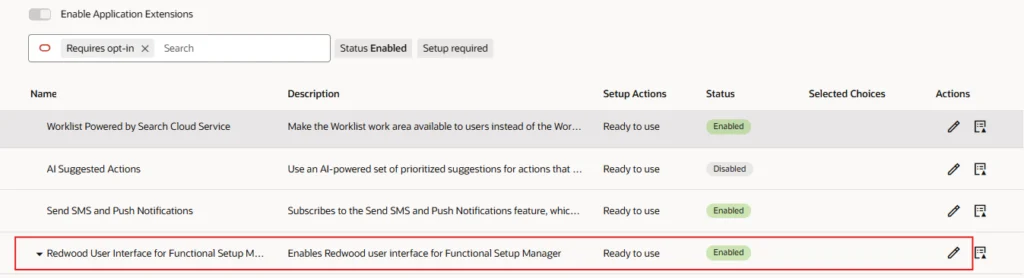
Step 7: Enable the following
Redwood: Extract Application Data from a Read-Only Data Store Using a Redwood Page.
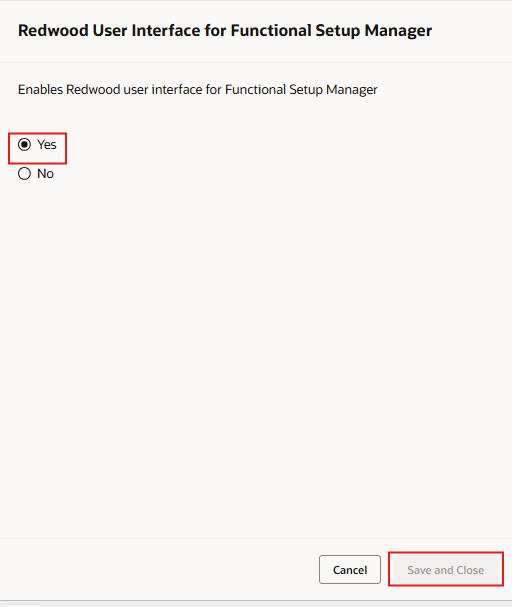
Enable Redwood User Interface for Functional Setup Manager by selecting Yes.
Click Save and Close, then click Done.
Also Read: Oracle Fusion Data Extraction Using Read-Only Replicated Database (RORD)
Phase 2: System Handshake (Profile Options)
This phase establishes communication between the Redwood UI and the underlying data warehouse services.
Step 1: Navigate to Setup and Maintenance.
Step 2: Click Tasks.
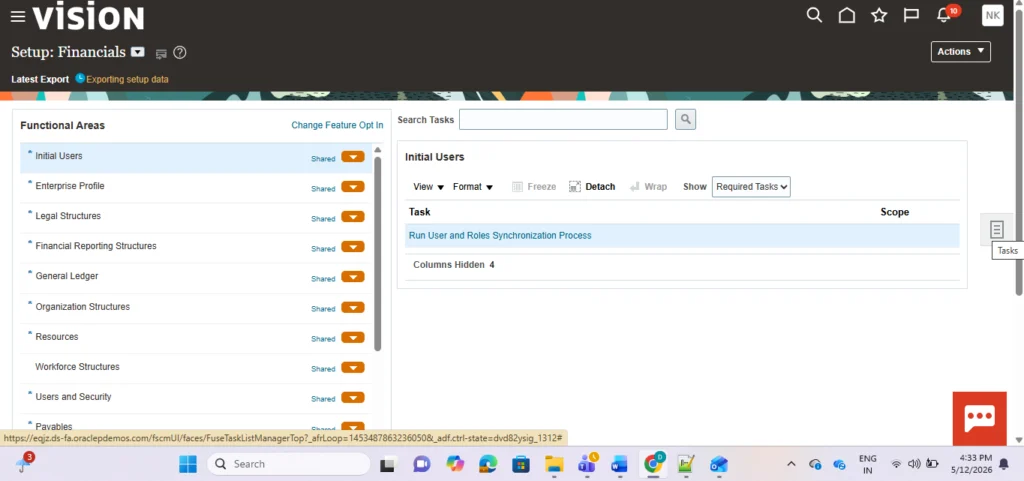
Step 3: Search for and open: Manage Administrator Profile Values
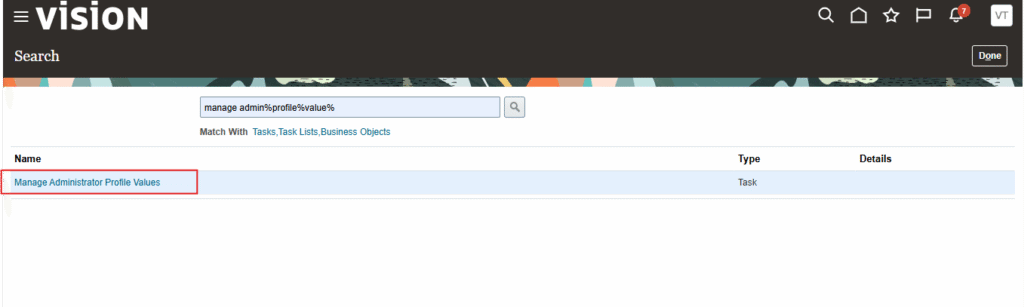
Step 4: Search for the following Profile Option Code: ORA_ASE_SAS_INTEGRATION_ENABLED
Step 5: Set the Profile Value to Yes at the Site level.
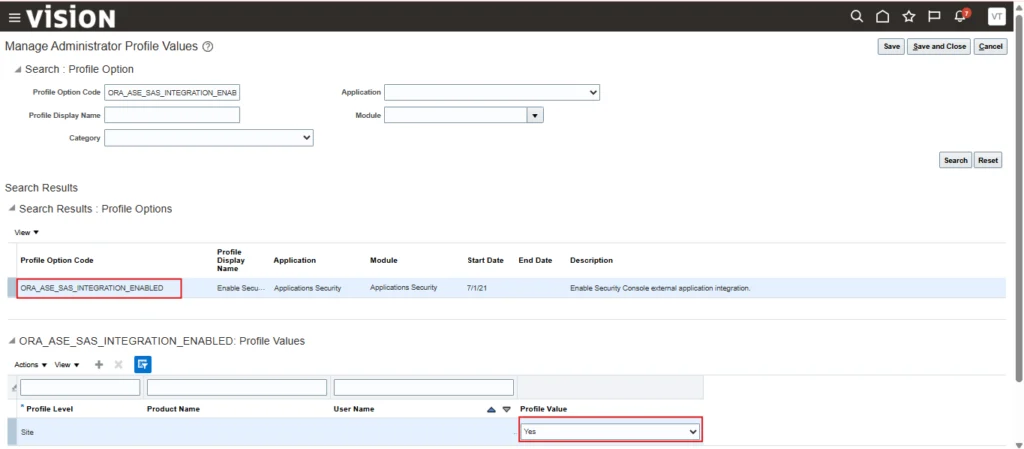
Step 6: Click Save and Close.
Phase 3: Security & Role Synchronization
To ensure all necessary “Duty Roles” are available in the Security Console, a manual synchronization is required.
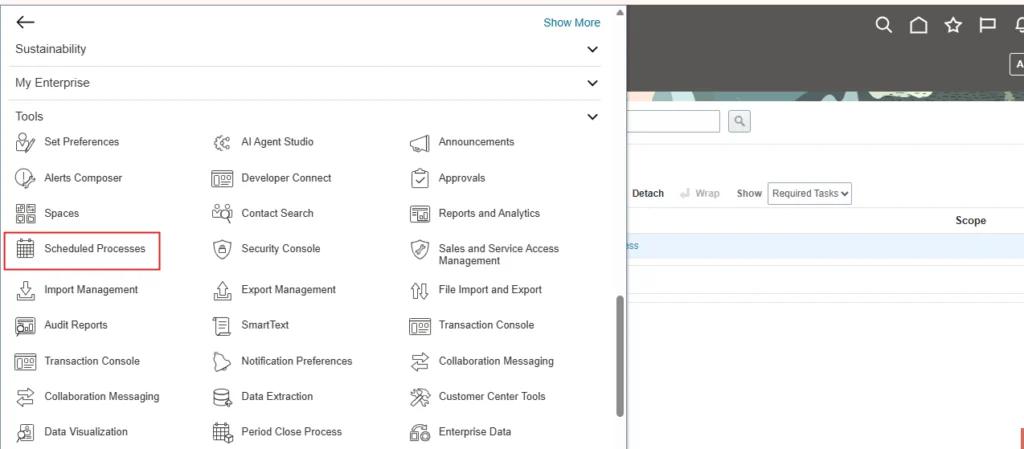
Step 1: Navigate to Tools > Scheduled Processes.
Step 2: Click Schedule New Process.
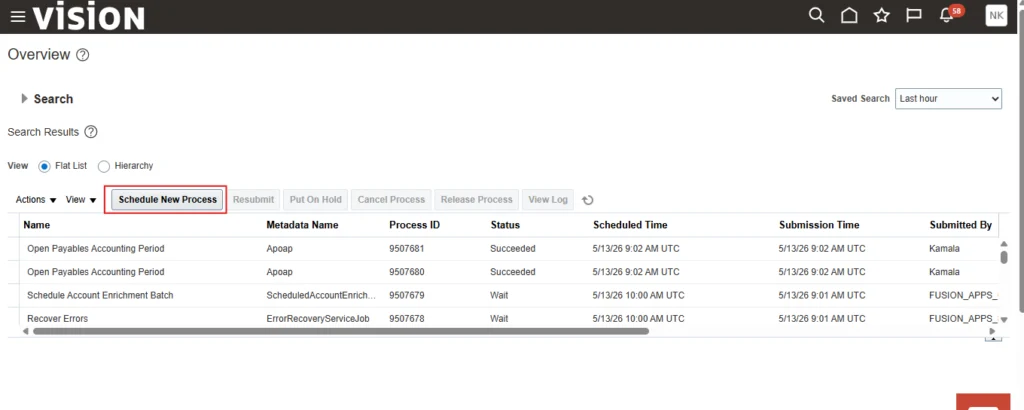
Step 3: Submit the following process: Import User and Role Application Security Data
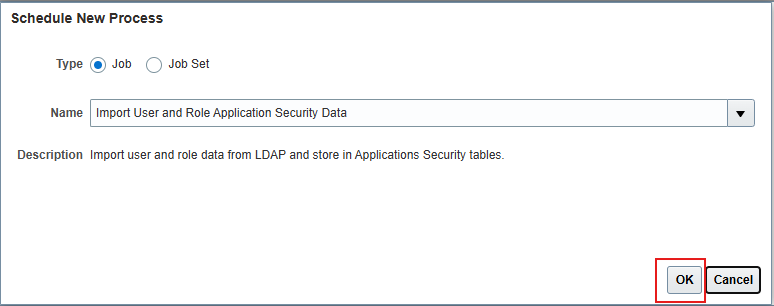
Note: If the process status is “Blocked,” wait for incompatible processes (such as LDAP shifts) to complete before resubmitting.
Also Read: Datafusing CloudSQL vs SQLConnect
Phase 4: Security Role Construction
In Oracle Fusion, Duty Roles must be housed within a “Job Role” to be assigned to a user. You must create a custom Job Role to act as a container for extraction permissions.
Step 1: Create the Custom Job Role and Navigate to Tools > Security Console.
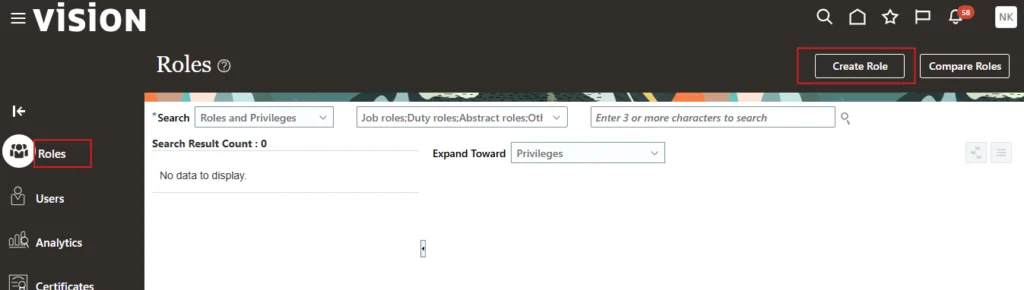
Step 2: Click the Roles tab and select Create Role.
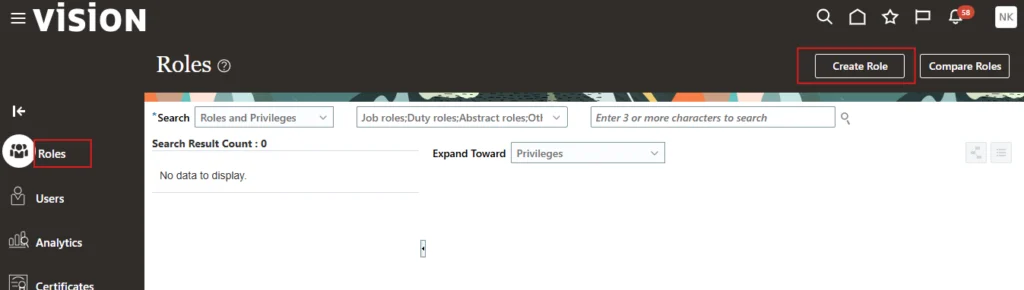
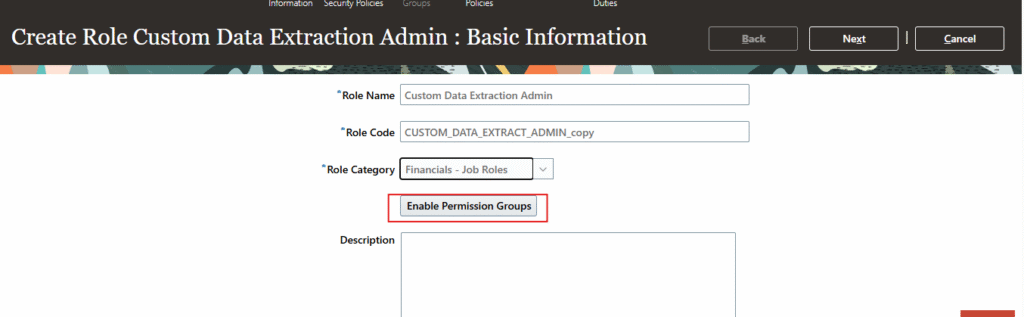
Step 3: Enter the following details:
| Role Name | Custom Data Extraction Admin (or preferred name) |
| Role Code | CUSTOM_DATA_EXTRACT_ADMIN |
| Role Category | Financials – Job Roles |
Step 4: Click on Enable Permission Groups
Step 5: Configure Role Hierarchy
Add the following Duty Roles to the hierarchy:
| Roles and Privileges | ORA_RCS_EXTRACT_SPECIALIST_DUTY (Manage definitions) |
| Roles and Permission Groups | ORA_DR_RCS_EXECUTE_EXTRACT (Execute extraction jobs) |
| Roles and Permission Groups | ORA_DR_RCS_EXTRACT_INTEGRATION (Access integration services) |
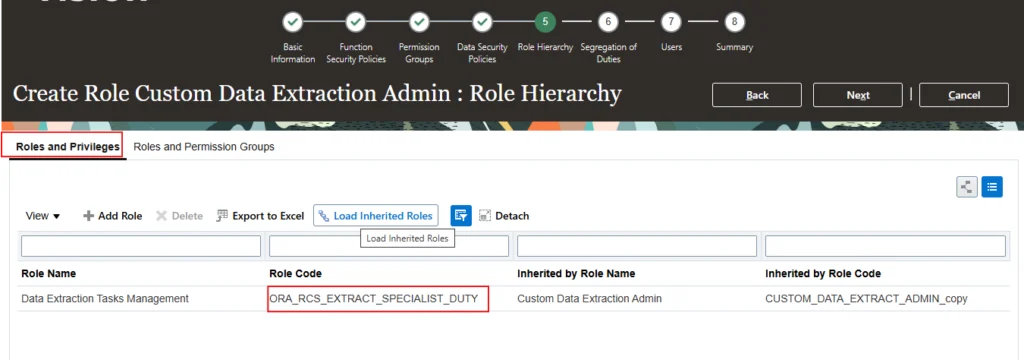
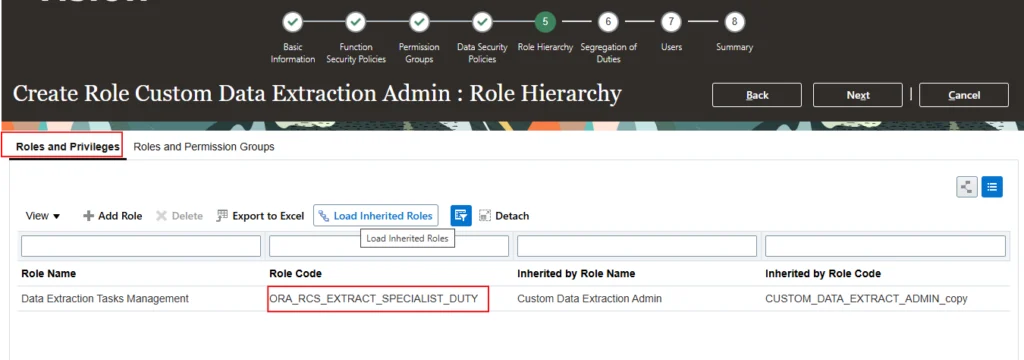
Step 6: Add File Handling Capabilities
Add the following Job Role to the hierarchy to manage output:
| OBIA_EXTRACTTRANSFORMLOAD_RWD (Required to view and download physical output files) |
Step 7: User Assignment
Assign this newly created Custom Job Role to your specific Username.
Also Read: What Is the ROI of CloudSQL Desktop for Oracle Fusion Development Teams?
Phase 5: Final Activation
Apply the security changes to your active session.
- Run the scheduled process: Retrieve Latest LDAP Changes.
- Sign Out and Sign Back In to refresh your user profile and menu structure.
Phase 6: Usage & Data Generation
Once the configuration is complete, data extraction can be performed through the Redwood interface
| Step | Action | Description |
|---|---|---|
| 1 | Navigate | Go to Tools > Data Extraction. |
| 2 | Define | Create a Definition by selecting Business Objects (e.g., General Ledger) and specific attributes. |
| 3 | Submit | From the Extract Jobs tab, submit a Full or Incremental extract. |
| 4 | Download | When the status is Succeeded, download the CSV/JSON output files directly from the UI. |
Also Read: Top 10 Oracle Fusion SQL Mistakes Developers Make