
Source Data
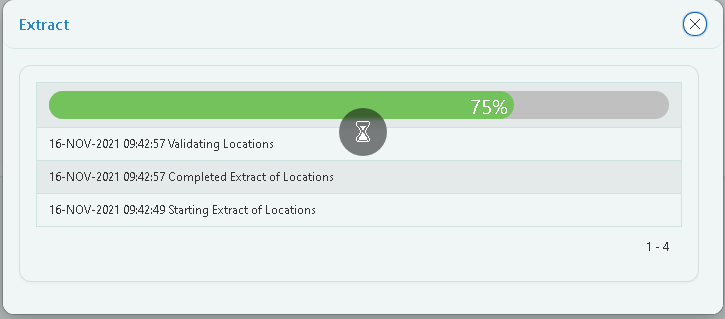
While clicking the ‘Next: Source Data’ button from the Target configurations page, a popup will appear with the progression bar showing the extraction and validation of source data.
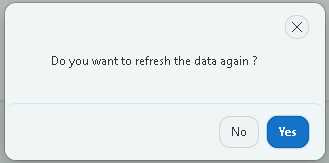
If the Source data have been previously fetched, the above confirmation popup will appear every time the Source Data button is been used.
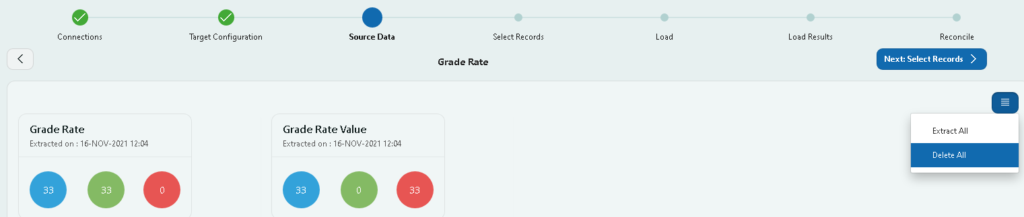
The page displays different levels of data for the selected object. Each block indicates different levels of data at the date and time at which it was extracted.
In the menu option towards the right, there are two options
- Extract All: On clicking extract all, it will re extract the data from the source instance.
- Delete All: On clicking delete all, it will delete all the existing data in CloudConfig.
The number shown in the blue circle badge indicates the total number of records in that level. Click on the badge to view the records.
The number shown in the green circle badge indicates the number of records that passed the validation against the configuration extracted in the previous page and the mandatory validations.
The number shown in the red colour badge indicates the number of records that failed the validations. These records cannot be migrated to the cloud. Click on the badge to view the errored records and the reason for failing the validation. On clicking the badge, a page opens as shown below with error messages and a number of records failing for the respective validation

Click on the number under error count to view all the records that failed for that validation.
Click on the number under distinct values to view all the distinct records that failed for that validation.
Click on the blue menu icon to download the list of errored records in excel.
After viewing the data click on the ‘Select records‘ button to continue